Here are a few basic steps to get you started on creating your own collection of unique little peg dolls to adorn your home with little bits of happiness.
Before you start...
You will need Scissors, needle and thread and a cup of tea!

Step 1. Take your largest piece of fabric from your pack, pipe cleaner and decorative string.

Step 2. Fold the Fabric in half.

Step 3. Cut a small triangle into the centre of the fold. approx 1cm in size.

This is now ready for your peg dolls head to pop through.

Step 4. Wrap the pipe cleaner around the base of the neck and twist until it doesn't move down.

Step 5. Place the fabric over the peg head.

Step 6. Make sure your pipe cleaner arms are straight, you are now ready to cut your fabric to the size of your doll.
Tip!..At this stage when you are more confident in the basic shape, you can start to add embroidery such as small flower detail, beading, buttons etc to her dress.

Step 7. Wrap your decorative string around her waist and tie. The fabric will automatically gather, but it is best to move the fabric around to create your dress style.

Step 8. You will have many types of beads in your pack, which you can adorn your doll with by making a little necklace for example. (you will need your needle and thread).
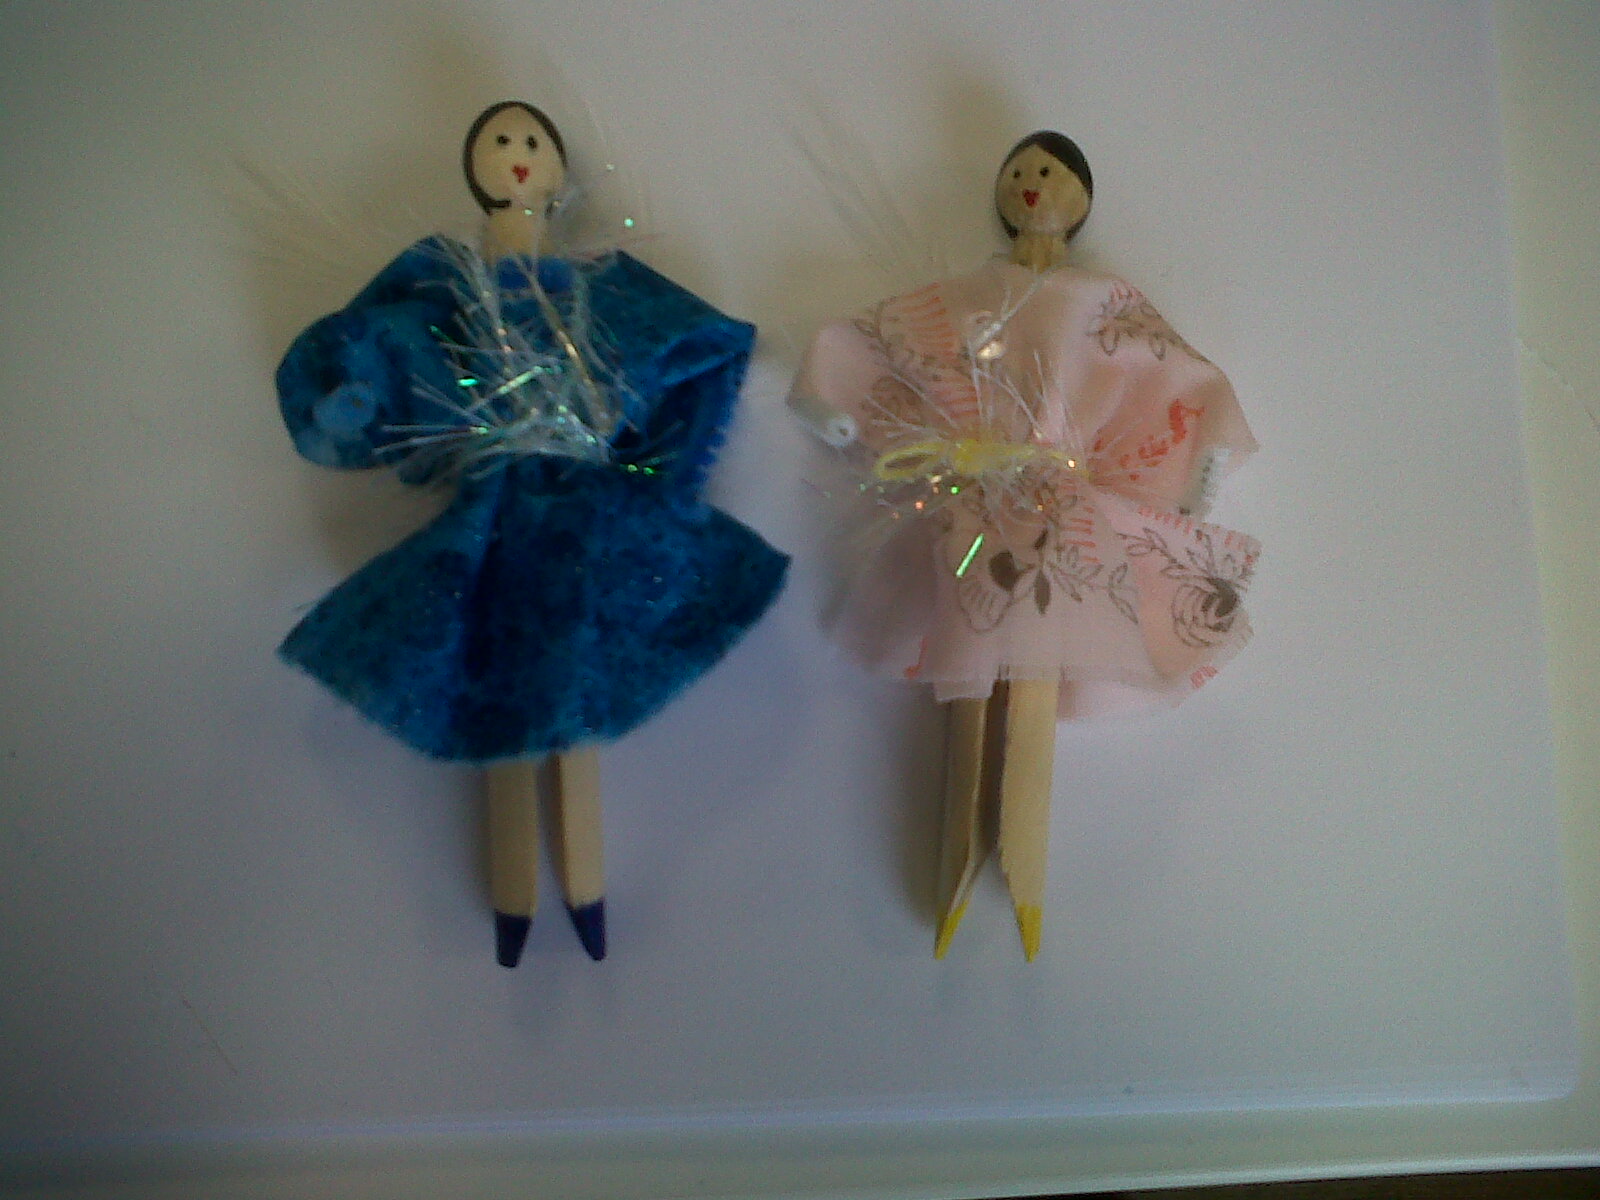
Here are to examples of the basic peg. Remember these are just basic first steps. You should have enough fabric in your pack to create two or three trendy outfits using embroidery and your own techniques.
Once your doll is finished give her a name and make her into a lovely fridge magnet, paper holder or washing line memo caddy etc..
I would love to see a picture of finished Dolly's and your story behind her! So please leave a comment or find me on my facebook page cheryll kung textile designer.
Have fun making!! xoxo
No comments:
Post a Comment